Showing posts with label recipes. Show all posts

Wednesday, June 29, 2011

A Cookie Jar and Some Chocolate Macadamia Goodness.


Almost eleven months ago, we celebrated our third wedding anniversary by getting veggie burgers  and tater tots at a drive-in restaurant and using something called a Groupon for the first time (maybe you've heard of it?) to go to one of those paint your own pottery places. I'd been wanting to go to one of those places since I was about ten. 

After taking a solid twenty minutes hemming and hawing over what we were going to paint together - something for the baby? something to hang on wall? - we decided to paint a cookie jar, with the agreement that I would always keep it filled with cookies. Amen.

The other day, I realized the cookie jar had been empty for quite some time. A travesty! And breaking one of my marital vows. This was unacceptable.

I'd been wanting to make some kind of cookie with macadamia nuts for a few weeks after compulsively buying a bag of them at Trader Joe's. I adapted a recipe and made some tasty little cookies.

The ingredients. Everything I have is from Trader Joe's or the bulk foods store.

What, you don't take photos of your ingredients for a recipe next to an old record player while your son eats a teething biscuit in the corner? :)

Chopping up macadamia nuts is hard. The little buggers slide around.
 
I've only been able to make cookies ONCE without eating some of the cookie dough.This was certainly not that time.

The little cuties all lined up and ready to go in the oven. Love my Silpat, man.

They are delightful, just soft enough, with big yummy chunks of nuts and chocolate. I love almond extract, so I put some in most of my cookies - it really makes them tasty.

They're delicious with some coffee or a cup of iced chai.


Macadamia Chocolate Chip Cookies
adapted from here
Makes 2  and 1/2 dozen
2 cups all purpose flour
1/2 teaspoon baking soda
1/2 teaspoon salt
1/4 teaspoon nutmeg
2/3 cup canola oil
2/3 cup sugar
3/4 cup brown sugar
1/3 cup milk (cow or non-dairy)
1 tablespoon ground flax seed
1 1/2 teaspoon vanilla extract
1/2 teaspoon almond extract (or more vanilla)
1 1/3 cups unsalted, chopped macadamia nuts
1/2 cup chocolate chips

Preheat oven to 350F.
Beat together oil, sugars, milk, flax seed and extracts. Add flour, baking soda and nutmeg slowly until well mixed.
Fold in nuts and chocolate chips.  Dough will be extremely thick and sticky. (Eat some.)
Drop tablespoon-sized portions onto a parchment paper-lined (or Silpat!) cookie sheet. Keep them roughly 2 inches apart.
Bake for 12-14 minutes.  Let them cool on the cookie sheet for 5 minutes after removing them from the oven – this lets them set. Cool completely on a wire rack.

Monday, May 16, 2011

How to Make Scrambled Tofu.

I can’t believe I was a vegetarian for five years before discovering scrambled tofu.

It sounds weird, I always thought. Probably doesn’t have much flavor.

I WAS SO WRONG. It's now a staple in our kitchen.

If you don’t like tofu, you need to try this. If you like delicious food, you need to try this. If you are scared of cooking tofu, you need to try this.

It’s easy, it’s fast, and it’s quite tasty.

You’ll need:
Olive oil
Garlic (as much as you want - smashed or minced or whatever)
A chopped onion (optional)
A pound-ish of extra firm tofu (I’ve made it with firm and medium firm tofu, as well)
1/4 cup nutritional yeast (in the bulk foods section of most grocery stores) (I leave it out if I don’t have it – no biggie)
Spices (I stick with cumin, tumeric, oregano, salt)

Step One:

 Saute the onion and garlic in olive oil for a few minutes – onion should start to get translucent. While they’re sautéing – mix 3 tablespoons of water with the spices and set it aside. (I use a teaspoon of salt, two teaspoons of cumin, a teaspoon of oregano, and half a teaspoon of turmeric. It tastes awesome, so I just stick with that combo.)


Step Two:

Drain the tofu and break up into chunks – heat for ten minutes on medium high heat. Turn up the heat if water collects in the pan; add a few splashes of water if the tofu looks dry. Use a spatula to flip the tofu a few times. The tofu should be brown and crispy on at least one side.


Step Three:

Add the spice blend and nutritional yeast. Stir until it coats the tofu. Yum. Cook for five more minutes, stirring as you feel like it. I usually turn up the heat for the last few minutes so it gets nice and crispy. I love crispy.


Ta-da! You’re all done. And it’s tasty. Eat with buttered toast, on a tortilla, with ketchup, with hash browns, or out of the pan with your fingers.

No one’s judging.

. . . . . . . . . . . .
Oh, ALSO, I have a post up on my review blog about the difficulties of teething - and there is a $100 Babies R Us gift card up for grabs (just share your teething coping methods). You should check it out if you need to get a new car seat, like we just did. Or have a lot of baby shower gifts to buy for other people. Or if you want to fill your closet with cute baby clothes.
. . . . . . . . . . . .

Monday, November 1, 2010

Easy Cheesy Tortilla Soup.

This is possibly the easiest thing ever.

One of my college housemates visited me a few weeks ago (on my birthday!) and made this for me. I was OBSESSED.

All you need is four cans: refried beans, black beans, corn, and broth.

Oh! And some shredded cheddar cheese and tortilla chips:


Mix all the contents of the cans (drain them first) and as much cheese as you'd like and simmer:

It looks like nasty muddy water, but it's gooood.

To serve - place some chips in a bowl:


Pour some soup on the chips:


Add more cheese and eat!


Yum.

Monday, October 11, 2010

Apple Rosemary Scones with Raspberry Jam.

IMG_1551
Apple rosemary scones.

Before I had Gabe, I wasn't sure how my life would change. I expected to be a little more stressed, get a little less sleep, and have way less time and energy to do the things I love. Like baking.

Happily, the adjustment has been far less terrible than I expected (in fact, it hasn't been terrible at all!) and I have enough energy to cook and bake like I used to. Of course, these days - I'm squeezing the baking in between taking care of Gabe, which means sometimes it takes a whole lot longer than it used to. 

It used to be: follow recipe, clean kitchen, eat goodies. Yay.

Now, it's more like: start getting ingredients for recipe, Gabe cries, pick him up, bounce him around till he's happy, carry him while I finish getting ingredients from pantry. Put him in bouncy seat, start prepping, Gabe cries, put him in infant carrier so he'll be close to me and hopefully fall asleep. Doesn't work. Take him out of infant carrier, feed him, he falls asleep, yay! Put him in seat, turn white noise on really loudly, finish baking as fast as I can. He wakes up, feed him, put him in bouncy seat, and do dishes. Eat goodies on the couch with him in my lap. Spill many crumbs on his head.

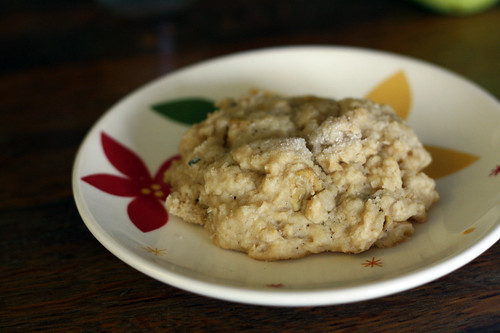
These scones are so worth it.

Vegan Apple Rosemary Scone.

They come from a cookbook, Vegan Brunch, by my favorite cookbook author (chef?). Absolutely every single recipe I've tried from her has been amazing. In fact, 90% of the recipes I post on this site are from Isa Chandra Moskowitz. Seriously, buy her cookbooks. I used to only use the internet to find recipes, because they are reviewed so I know they won't be duds (isn't making a bad recipe just the most disappointing thing ever?). With her cookbooks, I know it will be delicious. I don't know how she does it, but I love it. /End gushing.

I've been converted to vegan baking because of her. Her food is just good, being vegan is just a bonus. (Don't be shy if you like butter and milk, you can use those instead.) Just try this recipe!  You won't be sorry. The texture is absolutely perfect, and I love the flavor.

The jam is super easy to make - I've been making my own jam for a few years. It's definitely not low-sugar, but it's easy and cheap! Plus, it doesn't contain lots of additives like store-bought jam does. I used raspberries from when we went picking right before Gabe was born. (I froze them, because I wasn't sure I'd have time to make jam before he was born.)

Breakfast!
 (Vegan!) Apple Rosemary Scones 

Ingredients:
1 ¼ cups almond milk
2 tsp apple cider vinegar
3 cups flour
2 tbsp baking powder
½ tsp salt
½ cup sugar (plus more for sprinkling)
¼ cup fresh rosemary, finely chopped
¼ tsp ground nutmeg
1 tsp ground cinnamon
½ cup non-hydrogenated vegetable shortening (I used vegan butter)
2 tbsp canola oil
1 tsp vanilla extract
1 ½ cups diced apple

Preheat oven to 375° F. Lightly grease a baking sheet. Measure milk in a large measuring cup and add vinegar. Set aside to curdle.

Combine flour, baking powder, salt, sugar, rosemary, nutmeg and cinnamon in a large mixing bowl. Add the butter or shortening in small clumps, then use your fingers or a pastry cutter to cut it into the flour until the dough texture becomes pebble-like.

Create a well in the center and add the milk mixture, oil and vanilla. Mix with a wooden spoon until about half of the flour is incorporated. Mix again until all ingredients are just moistened, taking care not to over-mix. A couple dry spots are fine. Fold in apples.

Use a ¼ measuring cup to spoon mixture onto the baking sheet. Dust the tops with more sugar, then bake for 18–22 minutes, until tops are lightly browned and firm to the touch. Transfer scones to a cooling rack.

Raspberry Jam

Ingredients:
6 cups raspberries (fresh or frozen)
6 cups sugar 
(You use whatever quantity you want - just make sure you have equal parts berries and sugar.)

Wash and rinse all fruits thoroughly. Put fruit and sugar in a saucepan and bring to a boil while stirring rapidly and constantly. Continue to boil until mixture thickens.

To determine when the jam is done, use the "refrigerator test." Remove the jam mixture from the heat. Pour a small amount of boiling jam on a cold plate and put it in the freezing compartment of a refrigerator for a few minutes.  If the mixture gels, it is ready to fill.  I usually start to test after 10 minutes or so - you don't want to overcook it. Trust me. Also, keep in mind that the jam will thicken a bit as it cools, so if it seems a little runnier than store-bought jam, don't worry. (For more info or to make other kinds of jam, check out this website.)

And, now: EAT.
 
Yum.
Fin.

Wednesday, May 19, 2010

Recipe: Toasted Coconut Chocolate Chip Muffins

I love to bake, so often, I open up a cookbook and make the first recipe I have all the ingredients for. It's usually muffins, because they are such a convenient snack or breakfast (or lunch dessert! - everyone has lunch desserts, yes?) to take to work. This weekend, it was a delicious little gem involving toasted coconut and chocolate chips. Since I used some almond extract, it was almost like an Almond Joy in muffin form. 

Oh, yes.

Do yourself a favor and make these. NOW. (If you don't like coconut, I am sorry. But you should try to like it because it's really freakin' good.)


Toasted Coconut Chocolate Chip Muffins
from Vegan Brunch, makes 12 muffins

1 ¼ cups unsweetened shredded coconut
1 ¼ cups soy milk (or any non-dairy milk)
1 teaspoon apple cider vinegar

1 ¾ cups white whole wheat flour (I used 1 ½ cups of whole wheat pastry flour + ½ cup all-purpose)
¼ cup sugar
¼ cup light brown sugar (I just used all regular sugar – I don’t buy brown sugar)
½ teaspoon salt
1 tablespoon baking powder
½ teaspoon ground nutmeg
¼ teaspoon ground allspice

1/3 cup canola oil
1 teaspoon pure vanilla extract
1 teaspoon coconut extract (or more vanilla OR almond extract, which made it so. good.)

1 cup chocolate chips

1. Preheat the oven to 375 degrees F. Lightly grease a muffin tin.

2. First, toast the coconut. Preheat a large pan over medium-low heat. Pour in the coconut and, using a spatula, move it around slowly and consistently for about 4 minutes. The coconut should start browning almost immediately; if it doesn't then turn the heat up a bit. Remove from heat when toasted (it should appear honey brown to dark chestnut in color).

3. Measure milk into a measuring cup and add vinegar. Set aside to curdle ("curdle" is a funny word).


4. In a large bowl, mix together flour, sugar, salt, baking powder, nutmeg, and allspice. Create a well in the center and add the milk mixture, oil, and extracts. Mix together until just combined, then fold in toasted coconut and chocolate chips. Fill the muffin tin three-quarters of the way with batter and bake for 23 to 27 minutes, until a toothpick inserted through the center becomes clean. Let cool a bit until you can loosen the muffins and transfer them to cooling racks to cool the rest of the way.

Enjoy!

Sunday, November 15, 2009

Sunday Domesticity | Foolproof Granola.

I haven't had much time to cook lately, so I made sure to spent lots of time in the kitchen this weekend. I made cupcakes with peanut butter frosting, pumpkin pancakes, scrambled tofu, and an amazing pizza.

And....granola.

Oh, granola.

Making Granola.
(Cooking with bad lighting can't be helped. Alas.)

This stuff is amazing. So amazing it usually only lasts about 48 hours in our house. And warranted a 20-minute Google session to find it again. It's ridiculously easy, too, so anyone with an oven can make it.

I promise.

(Uses less packaging and is cheaper than store-bought, too!)

The Kitchen Sink Granola

3 1/2 cups rolled oats
1/2 cup coconut flakes, unsweeteend
3 tablespoons flax seeds
3 tablespoons sesame seeds
1/4 cup sunflower or pumpkin seeds
1/2 cup toasted mixed nuts, chopped (I used almonds)
2 teaspoons cinnamon
1 teaspoon sea salt
1/4 cup brown sugar
1/4 cup canola oil
2 tablespoons honey
1 tablespoon pure maple syrup
2 teaspoons pure vanilla extract
2 cups mixed dried fruit (I leave this out or add some raisins)

Preheat the oven to 375. Line a rimmed baking sheet with aluminum foil (I didn't line it - no mess and saved some foil. Win!) In a large bowl, combine all the ingredients except the dried fruit. Stir well to incorporate.

Spread the mixture on the prepared baking sheet, spreading it out into an even layer. Bake for 20 to 30 minutes (depending on the depth of goldenness you’re looking for), stirring every 10 minutes.

Remove the granola from the oven and and cool completely, in its pan, on a wire wrack. Once the granola is cool, mix in the dried fruit.

Enjoy with milk, yogurt, or by the handful.

Making Granola.
Oh, you don't even know how delicious you will become...

Recipe source.

Monday, November 9, 2009

You Can Thank Me Later | Pumpkin French Toast.

Amazing.

Mike got me three cookbooks from my birthday from my favorite chef. A cupcake cookbook, a cookie cookbook, and brunch cookbook. I am in heaven. Seriously, she's amazing. Here's my latest favorite recipe:

[It's Vegan!] Pumpkin French Toast
1 cup pureed pumpkin (from a can is just fine)
1 1/2 cups almond milk (or your favorite non-dairy milk)
2 tablespoons cornstarch
2 teaspoons cinnamon
1 1/2 teaspoons ground ginger
1/2 teaspoon ground cloves
1 teaspoon pure vanilla extract
1 stale Baguette, sliced diagonally in 1 inch pieces, or 8 pieces thick sliced bread
Cooking oil for the pan

Mix together all ingredients (except for the bread, obviously). Spread out baguette slices on a rimmed baking pan in a single layer. Pour on pumpkin mixture and flip to coat. Let sit for 10 minutes, then flip over and soak for 10 minutes more. (Less time if using less hearty bread - otherwise it will break from sogginess!)

Preaheat a large non-stick skillet over medium heat. Spray with cooking oil, or drizzle a little into the pan, and cook about half of the soaked breads at a time for 5 to 7 minutes on one side and about 3 minutes on the other. They should be golden to medium brown and flecked with darker spots. Keep warm on a plate covered with tin foil while you cook the second batch.

Photo + Recipe Source.

Wednesday, October 7, 2009

Cookie Monster Could Totally be Vegan.

Once upon a time, there was a girl who liked to bake. She baked for her sweet tooth and she baked for fun. She baked while laughing at The Daily Show and she baked while singing along with Voxtrot. She baked to warm up her kitchen and she baked to share with others.

But most of all? She baked because it's perfectly acceptable to add chocolate chips to nearly anything when baking.

On Saturday, I made a few dozen amazing vegan peanut butter-oatmeal cookies. They were from my favorite cookbook ever. I added several handful handfuls of vegan chocolate chips, because, well chocolate makes miracles happen.

And these cookies? Are miraculous. Seriously. They're the kind of cookies where you get to yell, while pumping your fist in the air, "Ha! You ate VEGAN COOKIES!" after everyone tells you how delicious they are.

Then your so-not-vegan-or-even-adventurous-food-wise-but-totally-lovely friends take equal pleasure in encouraging other guests at the housewarming party to try to cookies, then yell at the cookie-eater incredulously, "THEY'RE VEGAN!!"

Seriously. Try them.

The Truth.
They're the kind of cookies where you really want to blog about them, but can't resist eating them...until all that is left to photograph is half a cookie.

They're Vegan! Peanut Butter Oatmeal Chocolate Chip Cookies

2 cups all-purpose flour (I use half whole-wheat pastry flour. Try it.)
2 cups rolled oats
2 teaspoons baking powder
1 teaspoon salt
3/4 cup canola oil
3/4 cup natural peanut butter
1 cup sugar
1 cup brown sugar (or regular sugar and molasses if you're thrifty creative like me)
1/2 cup vanilla soy milk
2 teaspoons vanilla extract
1/2 cup chocolate chips (um, always add more. always.)

1. Preheat oven to 350F and grease a few cookie sheets.
2. Mix flour, oats, baking powder, and salt. In a separate bowl, mix oil, peanut butter, sugars, soy milk, and vanilla.
3. Mix both bowls together. Stir in chocolate chips. The dough will be firm. Scoop 2 tablespoons of dough out, roll into ball and flatten with the bottom of a drinking glass to about half inch thickness.
4. Bake for 8-10 minutes or until a bit puffy and brown.
5. Bask in the deliciousness, because: YUM.
6. Share with your neighbors because you have no sense of self control and are eating cookies for breakfast, lunch and dinner. (This step is optional.)

Adapted from Vegan with A Vengeance by Isa Chandra Moskowitz.
(Seriously, you should get this cookbook.)

Tuesday, April 7, 2009

Cupcakes. Need I Say More?

Peanut butter and chocolate vegan cupcakes.

I got Vegan Cupcakes Take Over the World from the library, and had a little spare time yesterday. So, I whipped up a batch of peanut butter-filled chocolate cupcake goodness, also known as:

PEANUT BUTTER CHOCOLATE HEAVENCAKES

Your Basic Chocolate Cupcake

Ingredients:
1 c milk (soy, almond, rice, or regular)
1 t apple cider vinegar (I used balsamic, it turned out fine)
3/4 c sugar
1/3 c oil
1.5 t vanilla
1 c flour
1/3 c cocoa powder
3/4 t baking soda
1/2 t baking powder
1/4 t salt

1. Whisk together milk and vinegar in a large bowl. Set aside for a few minutes. Add the sugar, oil, and vanilla to milk mixture and beat until foamy. In a separate bowl, sift together flour, cocoa powder, baking soda, baking powder, and salt. Add in two batches to wet ingredients and beat till no large lumps remain.
2. Pour into liners, filling three-quarters of the way. Bake 18-20 minutes at 360 degrees. Transfer to cooling rack and let cool completely.

Fill with Peanut Buttercream Filling/Frosting:
1/4 c softened margarine
2 T shortening
1/3 c creamy peanut butter
1 T molasses
1.5 t vanilla extract
1.25 c confectioner's sugar
1-2 T milk or creamer

- Cream together margarine and shortening with handheld mixer until smooth. Add peanut butter, molasses and vanilla and beat until very smooth, 2-3 minutes. Beat in sugar and dribble in milk a little at a time, beating continuously till frosting is very fluffy. I had a piping attachment for my pastry bag. I stuck it into each cupcake and filled it with peanut buttery goodness. YUM!

Top with Rich Chocolate Ganache topping:
1/4 c milk
4 oz semisweet chocolate chips
2 T pure maple syrup

- Bring the milk to a gentle boil. Immediately remove from heat and add the chocolate and syrup. Mix until fully melted and smooth. Set aside till ready to use.

(I also topped some with the Peanut Buttercream Frosting. Yum.)


They are seriously AMAZING. Like, eat-three-cupcakes amazing.

(Yeah, so maybe I ate three.)

(Today.)

(Don't judge me. I'm going running.)

PS: Isa Chandra Moskowitz, I love you. Please don't be mad for me putting your delicious recipes on the internet. I just want more people to know how great vegan baking can be! Also, seriously, I LOVE YOU.

Wednesday, October 15, 2008

An Ode to Grandma's Donuts.

My love affair with homemade donuts started many, many years ago. My wonderful grandma would wake up at 5am to have hot, crispy, fluffy, powered sugar donuts waiting for us as a treat. She'd always double or triple the recipe - since there was usually at least a dozen people at her house. We'd sit around the table in shifts - with our plastic cup of milk and licking powdered sugar off our fingers.

Those were glorious mornings.

When we made them at our house for the first time - it was odd. As if out of the context of grandma's house, they were no longer as special. My almost-16-year-old (oh my gosh, I am so old!) sister is as obsessed with making food as I am, so we made some this weekend.

Here's the recipe - illustrated! [Give it a try - it takes some time, but mostly just waiting for things to rise. Perfect for a Sunday morning.]

Ingredients:
3/4 cup milk
1/4 cup warm water
1 pkg active dry yeast
1/4 cup sugar
1 teaspoon salt
1 egg
1/4 cup soft shortening
3 1/2 (or so) cups flour

Bring the milk to a boil and then cool.
IMG_0177
I'm so in love with these kind of cook tops. Sigh. I dream of a day when things don't get caught under my burner.

Dissolve yeast in warm water.
IMG_0187

Add milk, sugar, salt, egg, shortening, and half of flour.
IMG_0191

Mix with spoon until smooth.
IMG_0195

Grab a cute sister to pose for you. {Promise sister you won't put picture on internet. Put it on internet anyway.}
IMG_0192

Add enough remaining flour to handle easily; mix with hands.
IMG_0200
Somehow, Emmie is bossy enough that I ended up doing this part. Which is kind of annoying, really, have your hands covered in sticky dough.

Turn onto lightly floured board.
IMG_0206

Knead until smooth and elastic (about 5 minutes)
MVI_0209
I recorded an adorable video of little sister demonstrating kneading. Silly Flickr.

[Get distracted by fridge. Wait, is that what I think it is??]
On their fridge...

[I love my mother. Who apparently loves Jim.]
IMG_0217

Wait! Where was I? Oh, donuts. Yes.
IMG_0218

Spray or grease bowl.
IMG_0220

Place dough in bowl and then flip over, so it's all greasy. Yum.
IMG_0228

Cover with damp cloth. Let rise in a warm place (85 deg.) until doubled - about 1.5 hours. (We had to put ours in a slightly-cooled oven since the house was chilly. After it rises, punch down and let rise for 30 more minutes.
IMG_0221
{Halloween-esque towel is optional.}

Roll out dough 1/3" thick. Cut with 3" floured donut or cookie cutter (you could always cut it up into squares if you don't have a donut cutter. Pillows taste yummy, too!). Let right again for 30-45 minutes. Leave uncovered, so crust will form on the dough.
IMG_0235

Drop into vegetable oil that is HOT (around 375 deg. or when the sizzle when you drop them in).
IMG_0245

Flip them over when you start to see the brown edges (usually less than a minute).

Cook a bit on the other side, too.

Then drain on paper (or cloth!) towels.

For powdered sugar donuts (aka: pure heaven), place in a bag with sugar and shake.

Eat them before everyone else does.

Dang it. Now I'm all hungry and stuff.